Showing posts with label tutorials; easter. Show all posts

Thursday, March 12, 2015

easter crafts


With Easter speeding towards us I thought 
I would round up a few of my Easter craft projects
here so you can get a head start on that bunny.

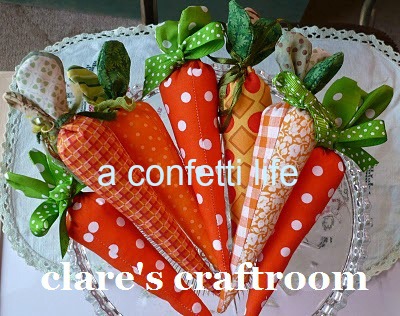
Fabric Carrots tutorial here.


Crepe paper carrots filled with popcorn here.


Beautiful and easy fabric daffodils here.


Shabby placemats and coasters here.


Some quick and easy craft for the kids here.

I'll be looking for more great Easter craft on
Pinterest in the next few days and I'll share
some more links here.

See you again soon!

Thursday, February 27, 2014

easter tutorials and those carrots

 
It really is time to get hopping with some Easter craft
so I have bundled up my most popular tutorials
so you can get started .
 
First off are my fabric carrots.
These have been pinned a sqillion times because
they are fun and so very easy to make.
You can find the tutorial here.
 
 
Then there is my favourite flower ever here.


Pretty shabby coasters and placemats here.
 
 
Tulip tutorial here.


Crepe paper carrots filled with popcorn here.


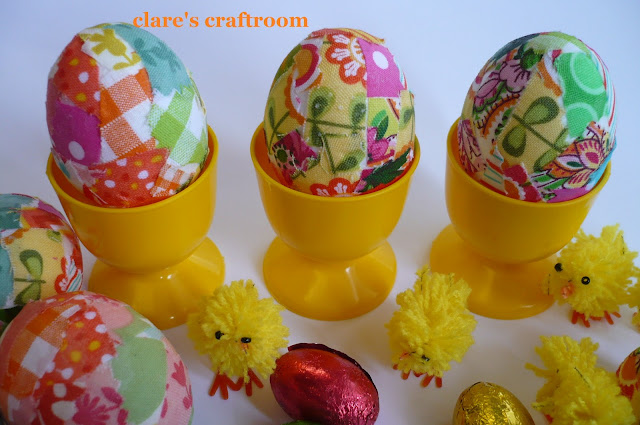
Speckled eggs here.
 
 
Some easy craft for the kids here.
 
Have fun crafting for Easter!


Thursday, March 28, 2013

no chocolate easter

 
I don't eat a lot of chocolate .
This probably offends some people so I am sorry .

 
I do know I am not the only one ~ some people don't eat it at all !
 
I made some crepe paper carrots and filled them with popcorn.
 
They look happy and fun !
They are very , very quick and easy to make . 


Just cut a large triangle from orange crepe paper.
Cut a long strip of green crepe paper.

 
Fold the triangle in half along the long edges and tape together .
Fill with popcorn or whatever you can use nuts or lollies even .
Pull the top of the carrot together and tape it closed .
Wrap the long green strip around the top and secure with tape .
Cut the greenery with scissors to make it frilly .

 
So there you go , even if you don't have chocolate you
can still have some Easter fun !

Friday, March 22, 2013

again with the carrots


Here is the link to my fabric carrot tutorial .
It's not far really just hop over to my new blog

Have fun !

Saturday, September 1, 2012

sprung

 
Good morning and Happy Spring !
I've been busy , busy , busy as a bee Spring cleaning
for my guests that are starting to come next week for morning tea.
Very exciting !

 
Are you a Spring cleaner ?

 
If you would like to make some of these daffodils my tutorial is here .
Gosh I love daffodils they are my favourite flower ever .
 
Do you have a favourite flower ?

Thursday, April 5, 2012

not according to plan

I was going to paint a heap of styrofoam eggs and then glitter them up
to have bowls of sparkly goodness around the house for Easter.


I pushed a skewer through them as it made them easier to paint.
There they were sitting up looking happy and pretty as they dried
so I tied a piece of ribbon onto them.


But you know with them all sitting in a jar looking very bright
and me being so very , very lazy ....


I've left them just as they are .

Wednesday, March 21, 2012

crafty easter soiree`


Hello there are you getting ready for Easter ?
Are you having a little Easter do for your craft group ?

Woolworths have these plastic eggs that snap apart apparently for children .
I think the children will cope without these.

If you put some crafty things inside they'd be great as a little
table decoration/gift at the big girls craft party .
Ribbons , cotton reels , buttons and little , teeny carrots will all fit .
You can still fit in a couple of little eggs too .


How's everything with you ? I hope you are well xx

Friday, March 9, 2012

speckled eggs


Speckled eggs ~ so cute and fun to make .


What else are you going to do with all these teeny , tiny scraps ?


All the little bits of fabric that just ends up on the floor is
cut into even smaller bits and simply glued to styrofoam eggs .
Even a plain gluestick does the trick .

Having a small bowl of water to clean your fingers as you glue and smooth is helpful.

The kids could help with these .
 If they really have to .

They look gorgeous displayed in a bowl or you could thread some string
through them and hang them from a branch for a different Easter display .

Friday, February 24, 2012

more but smaller


According to my stats lately my blog is receiving lots and lots of visitors.


They have all been coming from other sites that have kindly directed them this
way for my tutorial for Fabric Carrots .


Either way I'm glad you're here .


If you've been making fabric carrots this is a great way to use your scraps .

Make little , teeny carrots !

Sunday, January 8, 2012

so you can get hopping


I thought it might be helpful to if you
could find my Easter tutorials all in one place
and get an early start on the Easter Bunny .

Just a little bit of trivia ~
did you know my Fabric Carrots tutorial
has been viewed 17,540 times !

So if you would like that number to go up again
click here for the tutorial .


Daffodils are for anytime but especially nice for Easter.
Tutorial here .


maybe you'd like to try placemats and coasters
tutorial here.


Fabric tulips here.


 Easy Easter craft for kids here.


Or something for the Easter Bunny to carry his eggs in here.

There will be a Valentine's Day tutorial next week
and another Easter tutorial is coming up .

This lot should keep you out of trouble .

Thanks for hopping in , see you soon !

Thursday, September 1, 2011

well hello Spring , it's nice to have you back !


It's nice to have you back too !
Let's get started on making some beautiful daffodils .
You will need some daffodily coloured fabric,
some thin wire , buttons, cardboard for templates
and green electrical tape .

 
Use the cardboard to make a petal template
the one used here is about 2" high .
Cut out your template and use it to trace 6 petals
on double fabric with right sides facing.
Stitch around all the petals before cutting them
out with pinking shears .
 
 
Turn the petals right side out and press.
Tack along the base of the petals without breaking
the thread in between keeping them all together .
 
 
Pull the thread to form flower shape and stitch
securely together .
 
 
Cut two different pieces of coloured fabric approx
4" wide x 2" high .
Stitch along the top .
Open out and fold to form a tube , stitch .
Fold under raw edges.
Turn right side out with the folded edges as your base.
Turn over a small piece at the top.
Gather and secure the base with neat stitching .
 
 
Stitch centre to petals .
 
 
Thread wire through button .
 
 
Push the wired button through the centre of the flower.
Cover the wire with green electrical tape .


I hope I have made all this very clear and
haven't forgotten any photos or steps .

Wishing you all a blooming gorgeous Spring !