Showing posts with label tutorials. Show all posts

Sunday, March 8, 2015

really, really easy comb cover tutorial


Do you scrabble around in the bottom
of your bag for your comb
and when you eventually find it it has all sorts
gunk over it?

Or is that just me?

Anyway I've been meaning to make a cover
for ages so I thought you might like to make one too.

First cut out one strip of fabric 20" long x 3" wide.
The size depends on the comb you will be using 
just be sure not to make it too snug because 
it would be a pain to be able to finally find your comb
and then not be able to get it out of the cover.


Trim corners.
Once you have turned it right side out and pressed it
fold it in half and press it again.
Now just stitch down the two long sides.
That's it!


Just pop your comb in and it will be so much easier (and cleaner)
to find in the bottom of your handbag.

These don't take a lot of fabric so they would be great for
Mother's Day stalls wrapped in celophane with a pretty comb.

or just for you!

Don't forget the Creative Challenge sign ups close today.


Wednesday, February 25, 2015

easy tissue holder tutorial

 
Here's an easy tutorial for a tissue holder with a self facing trim
and these ones are lined so they aren't so flimsy.
Are you ready to make one or ten?


These are so good to have on hand as a little gift
or make a stack of them for fetes or Mother's Day stalls.

 
The longest part of making these is choosing the fabric!
 

Thursday, October 2, 2014

burp cloth tutorial


My nieces have been having babies
so I thought I'd like to make them something
very quick and easy and decided on burp cloths.
I really don't like the name burp cloths and I'm sure
when my nieces get these they won't call them that either
I'm thinking chuckers or chux but anyway I digress.


First of all I prewashed some fat quarters and some new white towels.
Then I cut the length of a fat quarter (about 22") 
and the width of about 10 inches.
The same measurements were used for the towelling back.

 
I used Dickies towels for the backing although you can
buy towelling at Spotlight it's nice to support
Australian manufactures.
 
 
With right sides facing stitch around the two
pieces making sure you leave a gap for turning.
Trim corners and turn right side out.
Give it all a good press.
 
 
Top stitch all around about 1/2 inch from the edges
closing the turning gap as you go.
 
That's it!
So very, very simple but such useful gifts.
 
 
You'll have a pretty stack in no time.


Friday, March 14, 2014

pineapple tutorial

 
So you'd like to make a pineapple?
 
 You will need about 1/2 a metre of pineapple
coloured fabric to make yourself 74 x 3" prairie points.
 
For the prairie points you cut a neat 3" square and
fold point to point and press. 
 Fold again to form the triangle and press again.
 
There are plenty of tutorials for making
large quantities of prairie points around just ask Mr Google.

 
You will also need a base that measures 15cm high x 35cm long.
 
 
Start by sewing a row of points along the bottom
with the points aligning with the edge.
Tuck each point into the one on the left.

 
Continue doing rows and rows with your stitching
close to the top so that it is easily covered by the next row.
Position your points so the ones above are evenly
spaced between the ones below.
Don't worry about overlapping the edges as these will
be trimmed off later.
Keep adding rows until you reach about 5cm from the top.

 
You need to use some green scrap fabric for the leaves.
Draw and cut out some templates from cardboard
as shown above.


Trace your greenery onto doubled green fabric.
You can do the whole lot and stitch around all of them
before cutting around them and turning them
right side out.
You will need 8 small leaves and 5 large ones.

 
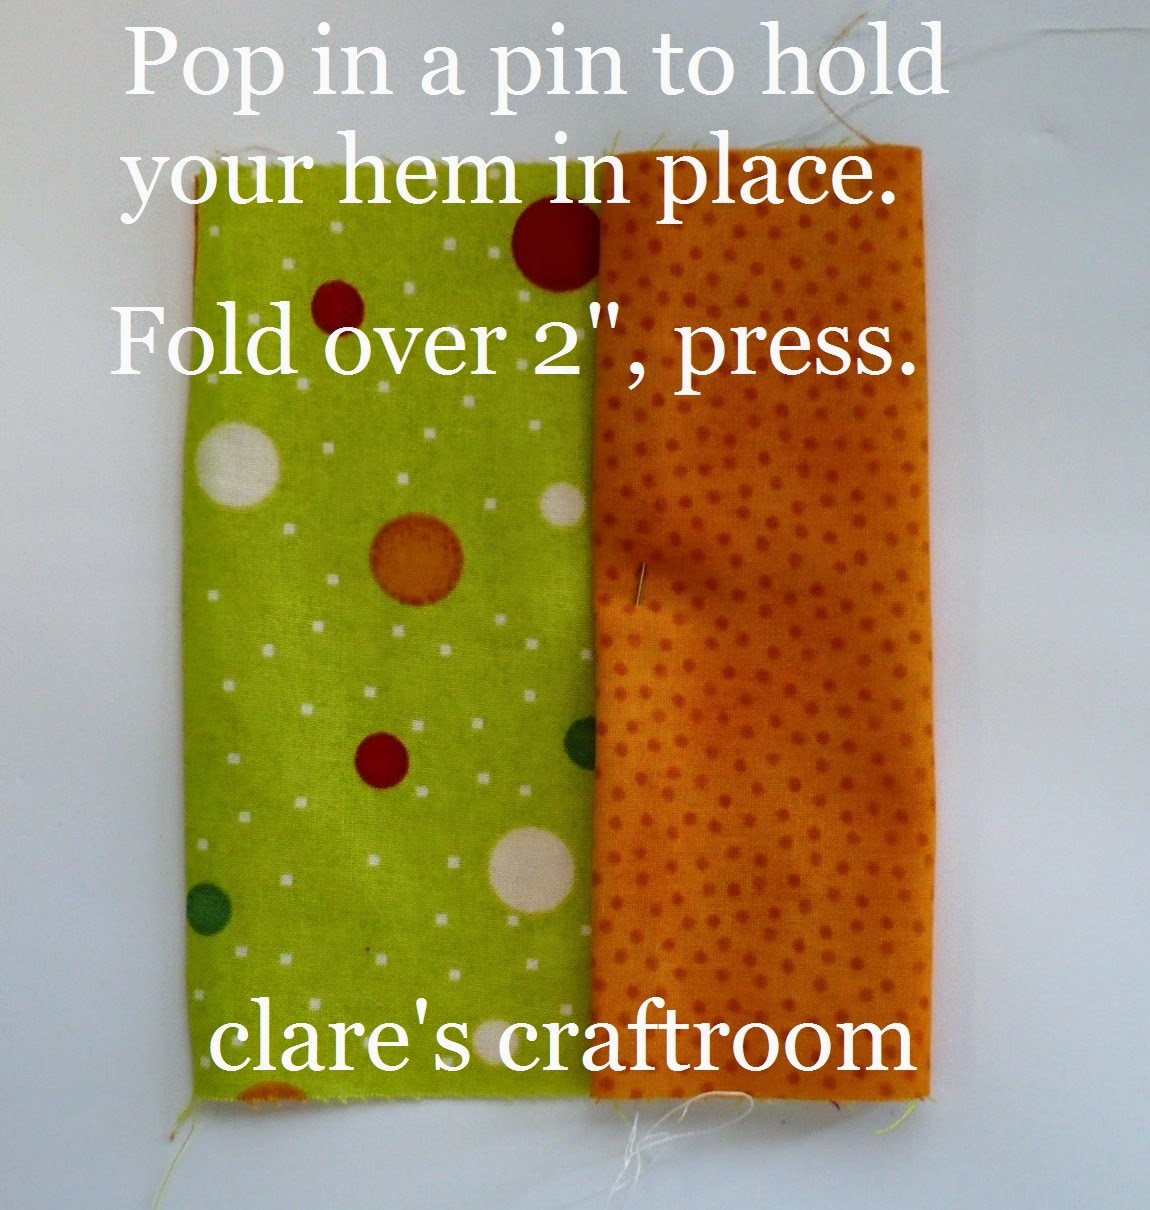
Turn under the top edge 2cm and pin the small leaves
along the front and space the larger leaves behind.
Stitch right along securing the leaves.

 
With right sides facing join edges and sew
about 1cm in to make the back seam.
Now you'll need to trim all the excess bits of points
to neaten it all up a bit.

 
Cut a 12cm diameter circle from your main fabric.
Pin it to the bottom edge of your pineapple taking
care you don't catch any points.
Usually after I pin the base I tack around it by hand
before machine sewing as I found it easier to pull the
pins out.

 
Now it should look like this!
 
Start stuffing.
 
When you have done all your stuffing just secure the top
by tacking around beneath the leaves and pulling tight to gather.
Keep stitching through all your top layers so everything
stays together because anytime anyone sees your
pineapple they have to play with it.
 
Flip the bottom, small leaves down so they cover the top row
of prairie points stitching.
You can add a few tiny stitches to keep them down if you like.


 What do you think ?
Will you be making a pineapple?
 
 
Thanks for visiting, it's nice to have you here. 

Sunday, October 13, 2013

bling bling

 
I do love a bit of sparkle , I really do.
None of it is expensive so I can get a pretty
necklace every now and then.
 
The problem is they get all tangled up and
I'm just not a patient person to spend ages untangling them.

 
So I covered a wooden coat hanger in washi tape
and then I screwed some little hooks in.

 
Now I can hang some from the mirror without them
getting all twisted together.

 
Do you love some bling too?

Friday, March 22, 2013

again with the carrots


Here is the link to my fabric carrot tutorial .
It's not far really just hop over to my new blog

Have fun !

Sunday, February 24, 2013

little hearts and your big hearts

 
I was so lucky to be a guest poster on One Artsy Mama
where I shared this tutorial for little hearts .
Since then a few have asked if I could repost it here
so they could keep my tutorials altogether (how nice !)
 
Well here it is ~
 
These little hearts are so quick and easy to make in any size
and they have a little pocket for your love notes so
you can send messages any time you like .
They also might be cute for popping in your little ones
lunch box with a sweet note from Mum xxx
 
 
The ones here are only about 2" but you decide how big
you would like yours and trace your heart shape onto cardboard.
 
There are 3 pieces of fabric ~ front , back and pocket .
The pocket piece has the top edge pressed down before
sandwiching between between the front and back pieces.
 
Trace your heart shape on .
Stitch around leaving a gap for turning .
 
 
Cut out heart shape and clip and snip .
 
 
Turn right side out and stuff very lightly .
Neatly stitch the gap closed .
 
 
Pop a little note in the pocket .
 
 
These should take you 10 minutes to make tops .
So you can make a pile of them and everyone will know
you are just lovely !


As I don't do Valentines I give a donation each year
to the Heart Foundation and this makes my heart feel really good.
 
EDITED  Since this post was published on February 14 I have been contacted by
a few amazing blog readers who have said they don't do Valentines either
and are going to use my idea of making a donation to The Heart Foundation.
 
I am so humbled to think that my little blog could influence some
in this way and I am so touched .
 
Thank you very much x 
 

Thursday, February 14, 2013

hearts (what an original title today)

 
Happy Valentines Day !
 
It is not a huge thing in Australia and it isn't even
acknowledged in my house besides the family
knowing that I make my donation to The Heart Foundation
on this day each year .
 
In the U.S.A February 14 is ginormous!
So you can imagine just how happy I was when
Amy from One Artsy Mama used my heart tutorial on her blog .
Thanks so much Amy I love your happy blog
and I'm thrilled to be posting there .
 
Please pop over and see my hearts !

Friday, September 28, 2012

let's make up

 
I've seen various tutorials around using felt circles and thought
how great they were but because I don't have a circle
cutter thingy there is no way I would be cutting 100 plus circles by hand.
So I thought I would give these cheap make up pads a go .

 
All I did was fold them in half and scrunch the bottom to form a point
and then hot glued the point to a styrofoam ball .
I used a knitting needle to pierce a hole all the way through
the ball first and threaded some cord through for hanging.

 
Then I glued and glued and glued and glued and


I ended up with this !
The photo doesn't do it justice it really is the softest
and prettiest thing and really beautiful !
Well worth all the gluing .
 
Don't forget if you have some Christmas craft even if
it is from last year come and link up here on Sunday to show us .

Friday, September 7, 2012

under the christmas tree

 
Yes , yes I know I'm a bit early but if I don't
get organised now I won't be organised again this year .

 
So because I am such a big thinker I thought maybe
I'm not the only one who wants to be organised this year.
I have also noticed that pinners are pinning a lot of Christmas stuff already.

 
So I thought what if I had a linky thingy here and you
could show what you are making to put under the tree.
You could link your sewing , recipes , decorations anything !
 
What do you think ?
Would you like to join in ?
What if I made a special button and you could tell
your friends what you have left under the tree ?
What if you could find all the links to the best Christmas stuff here ?
 
What if you found out it starts on Sunday ?
What about it ?